Back to the basics: No instruments required with hand-ties!
By Kristin A. Coleman, DVM, MS, DACVS
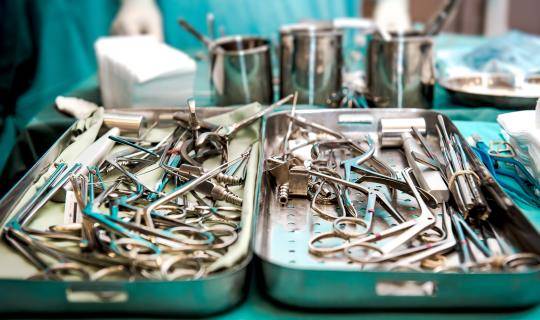
Have you ever struggled to perform an efficient knot with a needle holder in the abdominal cavity or other deep space? If you need another addition for your suturing toolbox, especially when the need for a secure knot is in a confined or hard-to-reach location, the hand-tie is the best concept to learn.

There are two varieties of this instrument-less suture knot: a ‘one-handed tie’ and a ‘two-handed tie’. The benefit of the one-handed tie is that you can tie a secure knot in a tight and/or deep space without the cumbersome nature of an instrument, and it allows for a faster knot to be performed. The benefit of a two-handed tie is the perceived ease of learning compared to the one-handed tie, and it technically allows better control of tension of the knot. Either of these knots may be performed with a variety of Securos suture types, but as you are learning to utilize these hand-ties, multifilament suture, such as Securosorb™, will have easier handling and knot security.
How to perform a one-handed hand-tie

Figure 1a.
The short strand of suture is held in the dominant hand with the end of the strand facing downward, and the thumb is used to compress the suture to the middle phalanx. The long strand of suture is grasped with the non-dominant hand.

Figure 1b.
With the short strand of suture still compressed between the thumb and middle phalanx of the dominant hand, the pointer finger is extended to stretch the length of suture. After this, the non-dominant hand is used to pull the long suture strand upward to create an “X” of suture over the extended dominant pointer finger.

Figure 1c.
The long suture strand held by the non-dominant hand compressed between the thumb and pointer finger is now shifted upward, and the suture is held over the non-dominant pointer finger. The dominant pointer finger is flexed and used to maneuver the short suture strand on the dorsal aspect of the finger under the long suture strand. Simultaneously, the suture remains compressed between the thumb and middle finger.

Figure 1d.
With the non-dominant hand remaining in the same position with the suture, the short suture strand continued to pass underneath the long suture strand.

Figure 1e.
The non-dominant hand remains in the same position, and after passing the short suture strand underneath the long suture strand, the short strand is now compressed between the dominant thumb and pointer finger.

Figure 1f.
The non-dominant hand remains in the same position, and the dominant hand, with the short suture strand compressed between the thumb and pointer finger, is flattened with all fingers extended parallel to one another and facing the patient.

Figure 1g.
The non-dominant hand remains in the same position, and the dominant flattened hand is rolled with the palm facing away from the patient with the short suture strand still compressed between the dominant thumb and pointer finger.

Figure 1h.
The dominant hand remains in the same position, and the non-dominant hand containing the long suture strand is pulled downward over the dominant fingers.

Figure 1i.
The middle finger of the dominant hand flexes over the long strand to then move the short strand along the dorsal aspect of the finger to manipulate it under the long strand. This image shows the middle finger in between the short strand (to left of finger) and the long strand (to right of finger in flexed joint).

Figure 1j.
This image shows the released short strand, which was previously grasped between the thumb and pointer finger, that is manipulated under the long strand by grasping between the middle and ring fingers.

Figure 1k.
Still grasping the short strand of suture between the middle and ring fingers, the dominant hand is flipped from palm up to palm down as the short strand is moved under the long strand to create the second throw of the square knot.

Figure 1l.
The square knot is tightened by pulling horizontally and with equal tension on both suture strands.
How to perform a two-handed hand-tie

Figure 2a.
With the short strand pulled down using the dominant hand, the long strand of suture is grasped between the thumb and middle finger of the non-dominant hand with the pointer finger used to extend the suture strand upward.

Figure 2b.
The short strand of suture is passed upward over the non-dominant pointer finger, creating an “X” in the suture.

Figure 2c.
The thumb of the non-dominant hand is shifted to pass through the right aspect of the suture “X” by touching tip-to-tip with the pointer finger (passing from thumbprint down to thumbprint up) then the short strand is grasped by the thumb and pointer finger. The short strand is now released by the dominant hand.

Figure 2d.
With the short strand of suture grasped between the thumb and pointer finger of the non-dominant hand from Figure 2c, the short strand is passed back through the suture “X”, the dominant hand re-grasps the short strand between the thumb and pointer finger, and the long strand is grasped again between the non-dominant thumb and middle finger with the pointer finger extended.

Figure 2e.
The long strand is then grasped by the thumb and pointer finger of the non-dominant hand to be pulled downward, and the short strand is pulled upward to create the first throw of the square knot.

Figure 2f.
The thumb of the non-dominant hand is shifted to have the long strand of suture on the dorsal aspect.

Figure 2g.
The short strand of suture grasped between the thumb and pointer finger of the dominant hand is pulled downward to create an “X” of suture over the non-dominant thumb. The pointer finger and thumb of the non-dominant hand then touch tip-to-tip.

Figure 2h.
The touching pointer fingertip and thumb tip of the non-dominant hand are passed through the right side of the suture “X” to grasp the short strand of suture, which is then released from the dominant hand. The short strand of suture is passed back through the side of the “X” to be re-grasped by the dominant hand.

Figure 2i.
A proper square knot will be able to set tightly and without slipping by pulling horizontally and with equal tension.
The recommendation is to master one of the two hand-ties, which will reveal itself as an extremely useful skill when the need to suture in a deep body cavity is required in the operating room. After following the steps in this article to practice both the one- and two-handed hand-ties, reverse the images and attempt them with your contralateral hand to investigate what feels most comfortable for you. Practice makes perfect, and these hand-ties may soon become your primary means of tying knots, particularly in areas where or situations when instruments are cumbersome.
Topics:
Veterinary practices